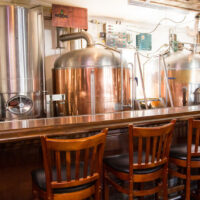
For many individuals, beer stains on washing machines may be a common and challenging issue. Unlike red wine spills, beer stains are colorless, tempting you to believe you shouldn’t worry. If not properly addressed, these stains may alter the look of your appliance as well as give up an unpleasant smell in your laundry area.
However, you can follow a few easy procedures to effectively remove beer stains from your washing machine. You’ve come to the perfect place if you’re seeking that answer!
This post will provide step-by-step directions on how to clean and maintain the appearance of your machine by getting rid of beer stains on it.
Let’s begin!
Why it is crucial to remove beer stains on your narrow washing machine with a width of 33 cm
If you have beer spills on your narrow washing machine, you must see that you removed them as soon as possible. This is because if left to dry and set, the stains may be challenging to remove in the long run. You do not want to see that sticky residue that attracts dirt and debris when beer is allowed to sit on your washing machine for extended periods. What’s more, beer stains on a narrow washing machine with a width of 33 cm may result in grime buildup, decreasing its cleaning ability. Both your health and your washing machine may suffer as a result of this. Read this guide on Casaetech for more about the best narrow and slimline washing machines on the market. In general, removing any stains from your washing machine is a straightforward process that has substantial advantages for both the machine and the clothes you wash in it.
How to remove beer stains from the washing machine
Here are some simple steps you can follow to remove beer stains from your washing machine:
- Clean up excess liquid: You’d want to start by wiping extra spilled beer onto the machine using a fresh towel or sponge. This will make it simpler to clean afterward and will aid in preventing the stain from spreading. Proceed by mixing a cleaning agent Mix equal volumes of water and white vinegar in a small dish. Dish soap may also be included in the mixture in minimal amounts.
- Applying the cleaning agent: Apply the cleaning solution to the stain using a clean cloth or sponge. Circularly work the solution into the stain until it is completely covered.
- Allow the solution to sit: Give the stain at least 10-15 minutes to absorb the cleaning solution. It will have more time to work on removing the stain as a result. Remove the cleaning agent by wiping it away with a fresh cloth or sponge. If the stain is tough to remove, you may need to clean it using a scrub brush.
- Rinse the area: After removing the stain, properly rinse the area with water to get rid of any leftover cleaning agent.
- Dry the machine: Completely dry your machine using a fresh towel or cloth. This will aid in preventing the formation of any new stains.
Narrow washing machine with a width of 33 cm care tips
Here are some care tips for a narrow washing machine with a width of 33 cm:
- Clean your machine regularly: cleaning is essential to maintaining the functionality of your narrow washing machine. Use a soft, damp cloth to wipe the machine’s inside and exterior. Any filth or grime that may have been collected will be removed when you do this.
- Choose the suitable detergent: Select a detergent for these types of washers. These types of detergents are formulated to work well with the unique features of your machine and can help improve its performance.
- Don’t overload: It’s essential to prevent overloading your washing machine’s restricted space. This can harm the machine by throwing it off balance.
- Use a low water level: If your narrow washing machine has a water level selector, be sure to choose a low water level for smaller loads.
- Be mindful of the detergent: Use the appropriate quantity of detergent for your load size. The excess detergent may produce excessive suds, which might upset the machine’s balance and even cause damage.
While the tips above can help increase your machine’s longevity and performance, remember to follow the manufactures recommendations when taking care of a particular product. This is especially important if, at one point, you need the use the warranty on your investment.
Conclusion
We hope this post has helped you remove beer spills from your washing machine.
As you can see, the procedure is relatively easy with the proper cleaning methods and products. Eliminating any stains from your washing machine is vital since doing so may keep the appliance clean and functional. Hence, it’s crucial to be ready for any spills or stains that may arise, whether you have small children who could spill beverages or you like to throw parties. Following the tips outlined in this guide will not only remove beer stains from your machine but also ensure excellent performance for years to come.
Good luck!